Christmas is always a good day with my family. Lots of food and presents and fun times.
I hope you had a lovely Christmas this year, and I hope your New Years is just as fun!
Happy Holidays. x.
Im not sure why I suddenly decided that nougat was a christmas treat. I don't think I've ever associated nougat with christmas before. But it seems to be a good combination.
I made this nougat to give as christmas treats, along with some relish and some caramels (soon to be posted). I'd given up on biscuits because I decided that they weren't going to last very long and no one was going to eat heaps of gingerbread on christmas day.
Making the nougat is fairly straight-forward. You boil the sugar mixture until it hits the right temperature on a candy thermometer and then beat it into some egg whites. But I guess it's a bit overwhelming using the candy thermometer.
Get over that fear! Make some nougat for your lovely family this christmas! They last a lot longer than cookies! And besides, it's fun wrapping them up individually, and you get to eat all the bits that you trim off!
Almond Nougat: From 'Sweet Food' Makes 1kg (about 30 pieces)
Line and grease a 28 by 18cm dish.
Place sugar, glucose, honey, salt and 1/4 cup water in a large heavy-based pan and stir over low heat until sugar dissolves.
Boil until mix reaches 250F on a candy thermometer.
Meanwhile, beat the egg whites in a large bowl until hard peaks form.
Slowly pour 1/4 of the syrup into the egg whites and beat for 5 mins, or until mix holds its shape.
Place remaining syrup over heat until it reaches 290F.
Pour slowly into meringue with the beaters running. Beat until really thick.
Add the vanilla and butter and beat for a further 5 mins.
Fold in almonds and cherries with a metal spoon, try to separate them out so they're not in clumps.
Pour mix into tin and smooth the top.
Refrigerate for at least 4 hours, before cutting into pieces with a very sharp knife and wrapping in waxed paper or cellophane.
Keep refrigerated.
I love relish. It makes everything taste good. Before I'd even thought about what I was going to buy everyone for Christmas, I already knew that I wanted to make relish to give as gifts (along with some other things).
I wanted to make a really simple relish, because I wasn't sure if the people I was planning on giving it to would appreciate something a little different. But I like plain relish, so everything is ok!
The relish wasn't actually meant to be sweet and spicy. It was an accident. A happy accident. I was really worried when I made it because I thought it was too sweet. I almost considered not giving it away, but I couldn't stand the thought of having 13 jars of relish sitting in my cupboard (All those tomatoes cost a lot of money!!).
So I took a chance. A rare chance. And decided to give out something I wasn't completely happy with (I haven't given them out yet, but you get the idea). I had a brilliant idea: If I called the relish 'sweet & spicy', then people would think that I meant to make the relish taste like that. As if I made it like that on purpose. No one needs to know that I accidentally put too much sugar and chilli in it! What a brilliant idea!
The relish was much easier to make than I had imagined it to be. Even though it's easy, don't go thinking that it's a quick thing to make. Oh no. This is the kind of thing you want to make on a day when you've got nothing else planned and would be happy to constantly watch a pot of relish for 3 hours (lucky I've got no life!).
Update: I just opened my last jar of this relish (6 months later) and the flavours of the relish have had a chance to mature and get to know each other a little better. After all this time, the flavours aren't so sweet and vinegar-y. They've mellowed out and taste really good. So if you can, I'd advise leaving a few jars in your pantry for a couple of months before opening them.
Sweet & Spicy Tomato Relish.
Adapted from Stephanie Alexander's "The Cooks Companion."
Makes about 3 litres.
*If you don't like your relish to be so sweet, you could decrease the sugar amount by 100g. If we're being honest, I'd definitely decrease the sugar next time. But If you like your relish sweet, then leave it as it is! It's perfect.
2 tbsp black peppercorns
3.5kg tomatoes, roughly chopped, skins removed
1kg brown onions, diced
6 garlic cloves
1 tbsp ground ginger
1 tsp cayenne pepper
1 tsp paprika
30g rock salt
500ml red wine vinegar
600-700g white sugar*
Put all ingredients except sugar into a large (very large) pot.
Bring to the boil and boil for 1 hour. Stir occasionally.
Add the sugar and boil for another 2 hours, stirring every 20 mins or so.
Use a potato masher to break up the big chunks of tomato and onion (If you have a food mill, you could use that instead).
Transfer the relish into hot, dry, sterilised jars. Cap the jars and then turn them upside-down, this creates a vacuum in the jars (I've read this in a couple of places, and it really works!).
Leave until cool before storing (and turning up the right way).
There's a certain feeling in the air. Have you noticed? The music in the shops has changed. The flags up around the city are sporting a different colour that only comes out at this time of year. People have smiles on their faces, for no reason at all.
All around the place, people are rushing. They're going about their Christmassy ways, trying to buy all their santa presents before the kids finish school. I went into town today, and there were more people there than I've seen all year. There were kids wearing santa hats, posties covered in tinsel, and shop assistants everywhere asking how your christmas shopping is going.
But people seem to be too busy with their Christmas things that they've forgotten that they have interests that don't revolve around this special time of year. No other holiday changes people as much as Christmas does. No other holiday divides them. Not nearly as much. Everyone likes the chocolate at Easter. And if they don't like the chocolate, they at least like the week off work. But not Christmas. Oh no. You can't be a fence sitter with Christmas. You either like it, or you don't. There's not two ways about it, Christmas changes you. It could put a spring in your step, or a frown on your face. Personally, I'm of the former camp. But I do know people who belong to the latter.
So this food post is for those latter people who don't like Christmas and don't want anything to do with it. This food post has nothing to do with Christmas at all.
A while ago, I told you about a certain Sunday dinner we had. At the time, I had planned to post all the recipes that I made. But things happen, and you don't always end up doing the things you plan to. So here's the recipe for the boeuf bourguignon I made at that dinner party. It came from Julia Child's "Mastering the Art of French Cooking" that Kirby and Arie gave me for my birthday.
Boeuf bourguignon is a bit of an involved dish, but it is super tasty. You have to cook the beef in a nice bottle of red wine for 2 or 3 hours, and while that's cooking, you have to cook mushrooms and onions in an indecent amount of butter. But it's all for the best. Trust me.
Julia Child's Boeuf a la Bourguignonne:
170g bacon slices, chopped
1 kg lean stewing beef, cut into cubes
1 carrot, sliced
1 big brown onion, sliced
2 tbsp flour
3 cups good red wine
2-3 cups beef stock
1 tbsp tomato paste
2 garlic cloves, minced
1/2 tsp thyme or oregano
20 french shallots, brown braised in stock*
500g mushrooms, sauteed in butter*
Preheat oven to 230C.
Saute bacon in olive oil in a cast iron, heavy bottom pot to brown slightly. Remove from pan.
Dry the beef in paper towels (according to Julia, the beef doesn't brown properly if it is damp).
Saute in batches in the bacon fat until brown all over. When a batch is done, add it to the bacon.
Brown the sliced vegetables in the pot, and then remove to a side dish.
Pour out the fat from the pot, and then wipe the pot clean.
Return the beef and bacon to the pot and season with salt and pepper. Sprinkle on the flour and toss to coat.
Put casserole in the oven for 5 minutes, toss the meat, and return to the oven for 5 mins more.
Remove casserole and turn down oven to 160C
Pour in the wine and enough stock so that the beef is just covered. Add the tomato paste, garlic and herbs.
Bring to a simmer on top of the stove, then cover and place in the oven.
Cook for 2 1/2 to 3 hours. The meat is done when tender.
*While the meat is cooking, prepare the onions and mushrooms.
When the meat is done, pour the liquid into a small saucepan, simmer, skimming off any fat, until you have 2 1/2 cups liquid.
Arrange the vegetables over the meat in the pot and then pour over the liquid.
Cover the casserole and simmer on the stove top for 2-3 minutes, basting the meat and vegetables with the sauce.
The dish can be served with boiled potatoes or buttered noodles or rice or whatever you like!
I remember my Mum making white christmas when I was younger. She always used copha to bind the good stuff in the middle, and being older now, I don't remember if I liked it or not. Vegetable shortening, in my mind, is a bit like butter that sets hard, and doesn't leave a good impression in my minds version of white christmas.
That's why I used white chocolate in this recipe instead of copha. And instead of sultanas, and red and green glace cherries, I used dried cranberries and pistachio's for a bit more of a grown up taste. I did keep the rice bubbles and a few glace cherries just to hint at traditional, though. You could probably even up the chocolate a bit, to make the chocolate to filling ratio lean a bit more towards chocolate. I'd recommend up to 50g more.
I took these into work so that I wouldn't eat them all, and after the girls worked out what was in them, really enjoyed them. I think these will please kids and adults alike, but don't take my word for it, make them for yourself and bring a little bit of white christmas into your life this holiday.
Bonus: they're really, really quick. I mean, 10 mins quick. Probably less, if you can melt your chocolate fast!
White Christmas:
The measurements for this came from "Sweet Food" but I changed most of the ingredients. So I guess we'll say it has been inspired by.
500g-550g white chocolate, broken into pieces
1 1/2 cups rice bubbles
1 cup desiccated coconut
1/3 cup red glace cherries
1/2 cup chopped pistachio kernels
1/2 cup chopped dried cranberries.
Melt the chocolate (I use the bain-marie method, but the microwave is fine).
While the chocolate is melting, mix all the other ingredients in a large bowl.
Stir in the melted chocolate and mix everything until well combined.
Pour into a foil lined 28/18cm tin and press everything firmly down. The mixture should be quite flat, rather than high.
Refrigerate until hard. Cut into rectangles or triangles.
It's not far away now. That time of year when I can listen to songs like "Baby, It's cold outside" and not feel like a complete loser because it's not actually cold outside here at all.
With this time of year also comes Christmas baking. I've done a bit of Christmas baking for the last couple of years, as presents for people who I can't afford to buy proper presents for, but this year, I'm going all out.
We'll start with gingerbread biscuits, because they're the most traditional, but (hopefully) we'll move on to white christmas, salted caramels, rum balls and my favourite christmas muffins. We'll see how we go! I'm sure I can do them all, but I'm not sure if I'll get them all up before Christmas. Oh well, I'll try my best.
These biscuits are really easy to make, just cream the butter and sugar and add the remaining ingredients. I like to call this One Bowl. The best kind of biscuit. There is a bit of waiting around, though, between kneading the dough, chilling it, rolling it out, cutting out, chilling again and then baking. I added in an extra waiting around because *I like to bake one biscuit tray at a time, for even baking. I'm sure you could bake two at a time and switch the trays half way through, but I always forget and then the top tray is crispy on top but not the bottom, and the bottom tray is crispy on the bottom but not on the top.
The icing is probably the most fun part. It's really easy to make, and you can get your creativity machine running with the designs you pipe on. I was just testing my designs out for when I make them properly, so these ones were just a bit of fun.
These are different to the other ginger-type biscuits that I've posted before, because these are roll and cut biscuits, rather than scoop and flatten biscuits. The icing is the same, though, because it's the best for piping. Either would be good for Christmas presents!
Gingerbread Biscuits:
Adapted from "Sweet Food"
140g butter, softened
115g brown sugar
1/4 cup golden syrup or black treacle
1 egg
280g plain flour
1 tsp bicarb soda
1 tsp baking powder
3 tsp ground ginger
2 tsp ground cinnamon
1 scant tsp ground cloves
1 scant tsp fresh ground nutmeg
Cream butter and sugar until fluffy and light.
Beat in syrup and egg.
Fold in dry ingredients until combined.
Turn out onto a floured surface and knead until smooth.
Cover with plastic wrap and chill for at least 10 mins.
Divide dough into two, keep one half in the fridge until ready.
Roll out between two sheets of baking paper until roughly 5mm thick.
Cut into desired shapes and transfer to a lined baking tray. Put the tray into the fridge for 10-15 mins.
Preheat oven to 180C.
Bake biscuits for 10 mins, they'll be dark on the bottom and firm on top (See note above *).
Cool on a wire rack.
For the icing:
1 egg white
1/2 tsp lemon juice
150g icing sugar
Food colouring, optional.
Whisk egg white until foamy.
Mix in the lemon juice and icing sugar and stir until glossy. If mix is too thick, add a bit more lemon juice (Remember that it's easier to thin out the mixture than it is to thicken it up again, so don't add too much liquid at once).
Have we already talked about how much I like Christmas? I don't know if I always liked it (I'm sure I loved it when I was a kid, too), but it took on a different meaning when I moved out of home and I could decorate the house however I wanted, going as crazy as I liked. We haven't got a tree yet, but I'm getting into the Christmas spirit with some easy crafty things (remember the advent calender I made? It was a success, by the way).
When I say easy, I mean really easy. This took me a quick half an hour before I went to work yesterday. I borrowed the fabulous idea from Creature Comforts (who makes lots of fancy diy crafts, not just for Christmas, but for all sorts of nice occasions). Her stocking garland was made out of paper, sewn onto a thick piece of coloured yarn. I decided to use material, because I had some left over from last years decorations that I made. I cut out the stocking shapes from different types of red material, and the top of the stocking from glittery white material, and then I cheated by stapling the bits together and pegging them onto some brown twine. When it finally came down to it, the material was too floppy, and didn't stay by itself, which was obvious, now that I think about it. So I cut out some cardboard shapes to match the stockings and I stapled those onto the material. Ta Da!
If you're going to make something like this, and you decide to use material instead of paper, I'd recommend ironing the material first. It's no fun having to iron the individual bits, trust me. If you wanted to go all out, and own a sewing machine, sewing the pieces together would be a much better idea than stapling the pieces together, but it'll be fine otherwise. I finished the stockings off with some leaves of holly that I picked from the neighbours driveway, to make it a bit more festive. I'm not sure how long the holly will last before it starts to die, but we'll see!
Happy crafting!
p.s. I discovered this band yesterday. This song is uh-mazing.
I went to my Dad's house today, because my sister was sick and wanted me to hang out with her. She likes to watch the O.C, and I like to bake things. So we did both. This cake was super easy to make. Caitlin made the batter, and I peeled the apples. The end.
But wait! There's more! This cake is more than just a regular apple cake. Soft morsels of cinnamon-y apple hiding amongst a moist cinnamon-y cake, topped with a crunchy, hard coating of sweet, buttery caramel. Goodness me was this combination delicious. We ate half the cake in one go!
This cake is a Smitten Kitchen recipe, and I trust what she says in all her recipes, but I couldn't stop thinking about caramel after I saw David Lebovitz's post on how to make dry caramel. So we added that as well. I hadn't made dry caramel before, but it's really easy. I think I prefer it to regular caramel made with water.
I don't have anything more to say about the cake, so here's a heap of photos. If a picture is worth a thousand words, here's six thousand words for you to look at. Hopefully they convey this delicious experience.
As I said above, my sister made the batter, so I'm not sure how much she deviated from the recipe (if she did at all. She follows the rules), so I'll give you the original batter recipe. But we did mix it up a bit with the caramel topping (which wasn't in the original recipe) and by changing around the order of the batter/apple layers. Also, the recipe said to bake the cake for 1 1/2 hours, but after an hour, our cake was done, so I've changed the baking time in the recipe. Like I said, only slightly adapted.
6 apples, we used golden delicious, peeled, cored and diced
1 tbsp cinnamon
5 tbsp sugar
2 3/4 cups flour, sifted
1 tbsp baking powder
1 tsp salt
1 cup vegetable oil
2 cups sugar
1 tbsp cinnamon
1/4 cup orange juice
2 1/2 tsps vanilla
4 eggs
Preheat oven to 180C. Grease a bundt tin.
Toss the apples with the cinnamon and sugar, set aside.
In a large bowl, mix flour, baking powder and salt.
In a separate bowl, mix oil, orange juice, sugar and vanilla.
Mix wet ingredients into the flour mix.
Add eggs, one at a time.
Arrange half the apples on the bottom of the tin.
Pour half the batter onto the apples. Arrange the remaining apples and then pour the rest of the batter on top.
Bake for about 1 hour, or until a tester comes out clean.
Turn the cake out onto a large plate and pour over the caramel topping.
Pour 1 cup caster sugar into a heavy based pan. Place over medium heat. Don't stir it, but just watch it until it starts to liquify around the edges. When this happens, start to drag the liquid bits into the middle of the pan, but try not to stir it too much, otherwise it can crystallise.
The sugar will start to caramelise at this point, so keep watching it until all the sugar is dissolved and the caramel is bronze coloured. Try not to burn it, as burnt caramel cannot be fixed. If you're using a black pan, lift some of the caramel out of the pan to check what colour it is. Once all the sugar has liquified, and is bronzey coloured, it's ready!
If you prefer a buttery caramel (I sure do), add a tablespoon of butter and stir it in. It will bubble up as the butter melts, but keep stirring it in until incorporated.
It hardens fairly quickly, so only make the caramel when you're ready to pour it over the cake.
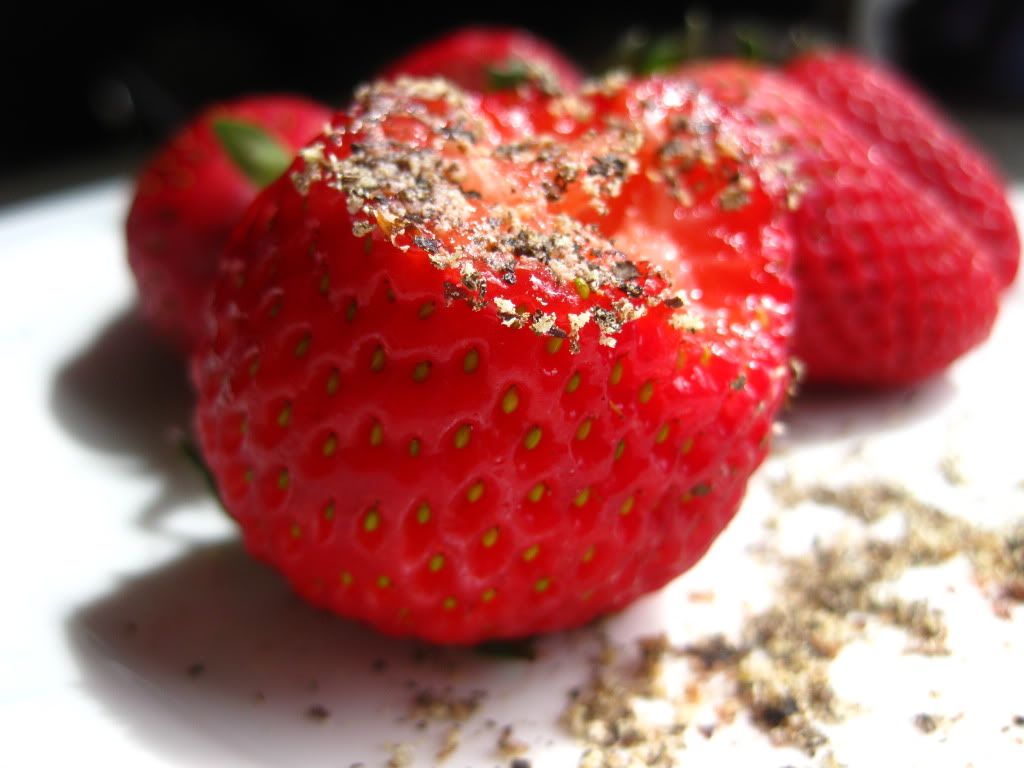
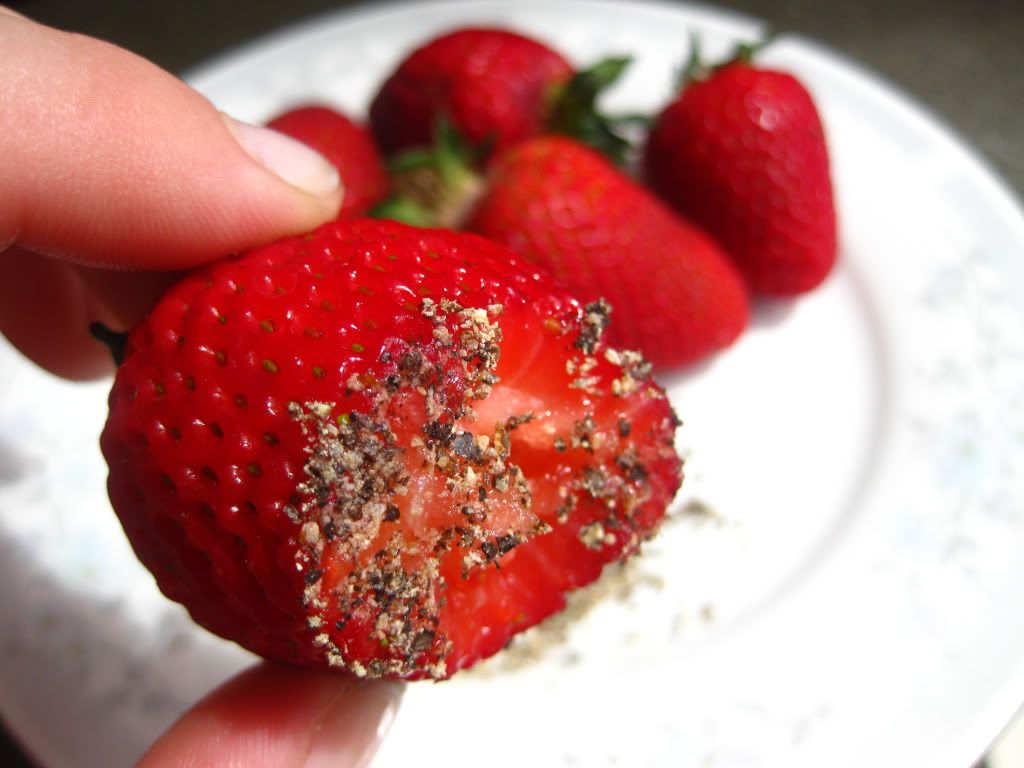
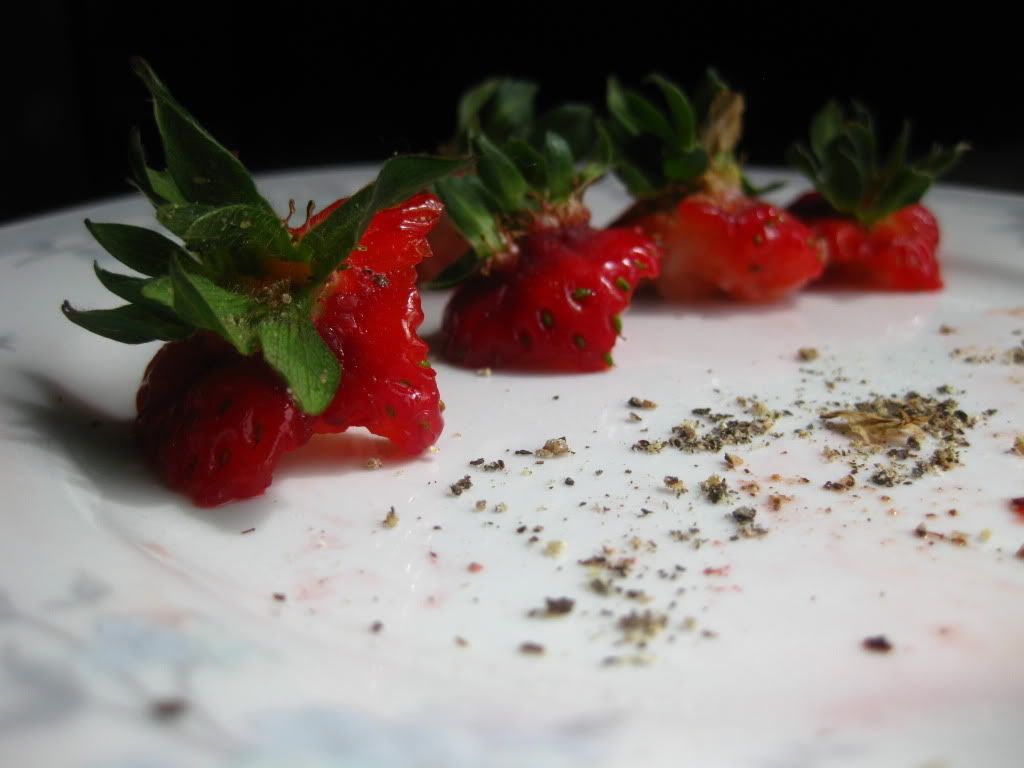
No. That isn't dirt on my strawberry. It's pepper.
I can't remember who told me that you should put pepper on your strawberries instead of icing sugar, but they were right. It seems like an odd combination, and when I first heard I thought it was wrong. But the ground pepper enhances the sweetness of the strawberries without overpowering the strawberry flavour. I'm not exactly sure why this is. I tried to google it, but no one could tell me (if you know why, I'd love for you to share!). You can't taste the pepper, exactly, it just does something amazing to the strawberries that you wouldn't expect.
So next time you've got some strawberries on hand, add a sprinkling of ground black pepper, instead of icing sugar or cream, and see the difference it makes. Go on, I dare you.
Oh, if you want a list of other (somewhat) suprising food combinations, you could check out this list that someone has put together on Listverse.
If you knew me well, you'd know that I like breakfast. Or maybe you wouldn't, because I often eat breakfast alone, and I guess breakfast isn't something that comes up as an exciting topic of conversation. I do think breakfast is exciting though. I think it's because my Mum likes breakfast, too, and the apple doesn't fall very far from the tree. Or whatever it is they say.
I usually eat breakfast by myself because Brent goes to work super early in the morning, far too early for a lazy girl like me. I'd like to think that I'd get up when he does, and make him coffee and toast before he goes to work, and then spend the day fixing the house and our pretend children, who would be adorable by the way. But I like to eat breakfast in a leisurely way, and, like regular people, I don't like getting up earlier than I need too. I don't particularly like breakfast in bed though. I'd much rather get up and eat on the balcony than lounge around in bed, wasting the day away. When I was younger, all I wanted to do was stay in bed watching movies in my pyjama's all day. I think I wanted to stay in bed because I thought it was what you were supposed to do. But now, I can't stay in bed more than 20 minutes after I wake up. It's just not possible. Even on weekends I like to get up, have a cup of tea and eat something for breakfast. Something proper. Like bacon and eggs, or toast, or pancakes (I don't even know if Brent likes pancakes, I haven't made them since we started living together). But I have to have something, otherwise I'm a grumpy girl.
This past Saturday, I made these breakfast pies for us. As usual, they weren't a spur of the moment thing. I'd decided on Thursday that we would eat these on the weekend. If you didn't know already, you do now - I plan my meals out, sometimes days in advance. When we had the Sunday dinner with Kirby and Arie, I think I planned that meal out about a week beforehand. Anyway, these pies are loosely based on the ones we get at my work. I looked at lots of recipes, but I couldn't find one that was exactly what I wanted: individual pies with a whole egg and lots of bacon. The way I did it in the end was pretty easy, even though I blind baked the individual pie cases first - I wanted the pastry to be really crispy without the egg yolk being too floury. If you don't mind a bit of soggy pastry, you could skip this step entirely. I served these with some sauteed spinach on the side, but I think sauteed mushrooms, or grilled tomatoes would be good, too. But do it your own way, it is your breakfast after all.
Breakfast pies: Serves 2
I've only got little cupcake trays, so my pies weren't very big, and only fit one egg in. If you've got those big muffin trays, you could whisk 2 more eggs with a splash of milk, and add that as well, to fill the pies up a bit more. I had planned on doing this, but I ran out of room in my pie case.
4 free range eggs
1 sheet puff pastry
2-3 rashers bacon, diced
a few springs of parsley and chives.
Preheat oven 200C.
Cut the pastry sheet into quarters and press them into a greased muffin tin, folding over the sides of the pastry to make a flat surface.
Line the pastry with baking paper and pastry weights/rice/dried beans.
Bake for 4-5 mins until pastry is puffed around the outside.
Take out paper and weights, and prick pastry with a fork. Put back in oven and bake until pastry is starting to get golden around the edges, about 5-7 mins.
Put a few bits of diced bacon in the bottom of each pastry shell.
The herbs can either go in here, or on the top, it's your choice.
Crack an egg on top of the bacon, and put some more bacon pieces on top of the egg.
Bake for 15-20 mins until pastry is brown and egg is set.
If you don't want to blind bake the pastry, just skip that step and bake the pies for 5-10 mins longer.
My gorgeous friend Alex, actor, musician, writer, breakfast cereal connoisseur, always said that he didn't understand how baking worked. How can you mix ingredients that don't seem to go together into a sticky, wet mess, which turns into a delicious baked good. When we used to have dinner together, Alex would often make a curry and I would make some cupcakes. He'd sit with me while I measured, stirred and baked our dessert, always curious as to how the mix would turn into something completely different when it was done. Now, I'll admit that I don't understand the exact science of baking, I guess it's something to do with chemical reactions of flour and wet ingredients, but I don't let that deter me from baking anything. I know how to follow a recipe, and I understand the basic principles of baking, and that'll do for me.
I know that Alex would enjoy these muffins, if we still lived in the same state. I miss Alex a lot. I miss those times when we'd spend nights watching tv together and eating nachos. That was a really good year for me. Maybe I'll have to send him some muffins in the post, and try and recreate those days with a wonderful friend.
These apple and cinnamon muffins are warm with spice and moist with chunks of apple. I don't always like muffins that use oil instead of butter, because I think it leaves a funny taste in your mouth, but I couldn't tell with these ones, so that's a bonus! *The original recipe instructed to mix the dry ingredients into the wet, which I thought was a bit weird, and it ended up being a bit lumpy. If I made these again, I'd do it the other way around. Other than that, there's no cons at all to these muffins. You should make some now. Right now.
1 egg
1 cup milk
1/3 cup oil
2 cups plain flour (you could use half plain, half whole wheat, if you prefer)
1/4 cup brown sugar
1/2 cup white sugar
3 tsps baking powder
1 1/2 tsp ground cinnamon
1/2 tsp salt
1/4 tsp ground nutmeg
2 large, or 3 small, apples; peeled, cored and diced.
Preheat oven to 200C.
Mix egg, milk, oil in a bowl.
In a separate large bowl, combine everything from flour to nutmeg.
Pour half of the wet mix into the dry and combine. (*see note). Repeat.
Stir in the diced apple.
Spoon mix into 12 muffin cases.
Bake for 20 mins. A skewer inserted into the middle will come out clean.
I love christmas. I think it's my favourite time of year. And I know this post has nothing to do with food, but hey, I do other things than cook, and I'm sure you do too. The inspiration for this advent calender came from Oh, hello friend, you are loved. Really it's just some paper bags and some pegs, but I think it looks pretty good. I've got it strung up on the wall so that Brent can open a bag each day during December and find a present.
I haven't filled all of the bags yet, but I've got a couple of days before they're ready to be opened. I hope Brent hasn't been peeking while I've been at work! I'll let you know how it goes...
The other day I was feeling a bit under the weather. I tried hanging out with some friends, but they all work sensible hours (like, during the day. Weekdays.), and I hardly work at all (seriously, I need to get another job). So I did as any self respecting girl would do: I shaved my legs, did my hair, put on a dress, and made some choc chip cookies.
Surprisingly, I didn't actually make these cookies for myself. My lovely stepmum convinced me that I should make them for the School Fete. I do my teaching placement at this school, and my little brother goes to this school, so, seeing as I'm now part of the School Community, it would be lovely of me to make something. "You could put it on your blog!"
I've seen this recipe on lots of sites, and I decided that I wanted to make them too. To add my contribution to the blogosphere, if I may be so bold. The original recipe is from David Leite who wrote an article for the New York Times about the consummate choc chip cookie. I think he did a pretty good job.
These cookies actually need to be kept in the fridge for up to 36 hours before you bake them (!). So after making the mixture, I sat around for 2 days before I baked them (not really, I did other things too. Like reading "Anna Karenina" and watching the best movie ever). Honestly, I did succumb to tasting these cookies before their 24 hours were up, so I baked just two. One for me and one for Brent (I think they tasted really good without being left in the fridge for a day. But, whatever, I follow the rules).
These cookies are really great though. They spread and crack on top, just the right amount. The choc chip discs (you have to use discs, not buttons) really made the cookies. Although, I do think there were too many chips in the recipe. I ended up with all this chocolate left over and no dough to bake them in. They also take a while to do, because you can really only bake one tray with six cookies on it at a time. So to get through 30 cookies, it could take you a while. But it's a little bit zen to do it this way. I do think you should make these though, if only for a special occasion. I don't think they're an everyday sort of a cookie. Definitely not a I-have-a-craving-for-choc-chip-cookies-and-I-need-them-right-now sort of a cookie. But I'll leave that recipe for another day...
The biggest changes I made to the recipe was to use half plain flour and half "00" flour instead of bread flour and cake flour, and I think it worked out fine. The recipe called for sifting, but I never sift anything (I don't own a sieve), but it didn't make a difference really. I changed the weights into grams, rather than ounces. I didn't put any vanilla extract in mine, because I'd run out, but I'll leave it in the recipe for you. I reduced the amount of choc chips because, as I said already, I ended up with heaps left over. You could probably reduce this amount a little bit more, if you felt like it. Also, the original recipe said to sprinkle salt on top of the cookies before baking them, but I kept forgetting, but the ones that did have salt on them tasted super good.
Special Occasion Choc Chip Cookies. Adapted from David Leite.
240g "00" flour
240g plain flour
1 1/4 tsps baking soda
1 1/2 tsps baking powder
1 1/2 tsps coarse salt
1 1/4 cups unsalted butter
280g light brown sugar
280g granulated sugar
2 eggs
2 tsps natural vanilla extract
550g dark choc chips (try and use discs, rather than buttons)
extra salt, for sprinkling, optional
Cream butter and sugars until light and fluffy.
Add eggs, beating after each one. Add vanilla.
Add dry ingredients, and mix until just combined.
Mix in choc chips.
Cover with cling wrap and refrigerate for 24-36 hours (can be refrigerated for 72 hours).
When ready to bake, preheat oven to 170C.
Scoop 6 cookies the size of golf balls and place on a lined baking tray. (Bake one tray at a time.)
Sprinkle with sea salt before baking (optional).
Bake for 18-20 mins until golden but still soft, they harden up as they cool.
(N.B. While waiting for one tray to bake, get another tray ready with 6 cookies and leave in the fridge until ready. The cookies bake better if they're chilled.)
These cookies are best eaten while they're still warm.
I've always wanted to host a dinner party. Always. In my Ideal Dinner Party Situation, everything would be perfect. The wine would be good, the table would be set in a fancy design, there'd be lots of people in lovely dresses/suits, the food would be amazing, and I would play the perfect hostess. Instead, we don't live in a house big enough to host a dinner party, so alas, I'll have to keep dreaming about the perfect dinner party. One day. It'll happen one day.
But in the meantime, I can have dinner with as many people as can fit in our lounge room, and around the tiny table that I borrowed from my Dad. That makes a total of four whole people. So there was Brent, Me, Brent's sister Kirby, and her boyfriend, Arie. We squished around this table that I set up (at the time, it didn't look like the one above. I didn't take any good photo's at the time, because I was embarrassed, I've never had people watch me take photos like that before, so I re-set the table when I was cleaning up this morning. Sneaky. In an Ideal World, my table setting would have looked [like this]), and ate this huge meal in the space of an hour, because we decided to catch a movie after. We had a simple tomato Bruschetta, Beouf Bourguignon (Julia Child's recipe, of course), and French Apple Tart (also Julia Child's). I could tell you about all the bad things about the meal, but let's focus on the positive, shall we? The tomato Bruschetta was nice, the tomato/fetta/red onion combination never fails. The sauce for the Bourguignon was really rich from the wine and tasted really good, but I think the mushrooms and the onions (which had been cooked in an indecent amount of butter) were my favourite bits. The apple tart looked really pretty, if I may say so myself, I was super proud of my lovely apple-pattern on the top. The apple sauce mixture underneath was really tasty and spiced just the right amount (it was even good for breakfast this morning with some yoghurt and some homemade granola). I'll give you the other recipes at a later date, but we'll start with the apple tart. As my Mum always says, eat dessert first. So that's what we'll do.
The apple tart wasn't hard to make, it was just time consuming: making the pastry, peeling/coring/slicing all the apples, making the apple sauce. But I think it's worth it, especially for a special occasion. It makes you feel very domestic-goddess, being able to produce something like this from your very own kitchen.
French Apple Tart:
From Julia Child's "Mastering the Art of French Cooking."
Makes one 25-26cm tart.
For the Pastry:
2 cups pastry flour ("00" flour)
1/4 tsp salt
3 tbsp white sugar
200g cold butter, chopped into bits
1/2 cup iced water
Mix flour, salt, sugar and butter in a big bowl. Rub the flour and butter together with the tips of your fingers until the mix resembles crumbs. Don't over mix, you don't want the butter to get too warm.
Add the water and quickly mix in with one hand. Add a few more drops of water if the mix hasn't come together. The dough should hold together without being sticky.
Turn the dough out onto a floured board. With the heel, not the palm, of your hand, knead the dough to blend it together. Sprinkle it lightly with flour and wrap in baking paper and place in the fridge for 2 hours or overnight before using.
When ready to use, place the dough on a floured board. Roll out into a thin circle bigger than your baking tin. Lift the dough off the board and lay over your greased tin. Press the dough into the tin and prick all around with a fork. Cover with a square of baking paper and then pour in rice, dried beans or baking weights. Blind bake in a 200C preheated oven for 8-10 minutes until base is set. Remove the paper and weights and bake for another 3-5 minutes until pastry starts to colour.
For the Apple topping:
2 kg apples (I used golden delicious and fuji's)
1/3 cup apricot jam
2/3 cup white sugar
3 tbsp butter
1/2 tsp cinnamon
zest of 1 lemon
Peel, core and quarter the apples (You might like to have a sit on the couch whilst you're doing this). Cut enough of the apples into thin lengthwise slices to make 3 cups. Toss them with 1 tsp lemon juice and 2 tbsp sugar. (for the top of the tart).
Cut the remaining apples into chunks, about 8 cups, and place in a pan with 3 tbsp water. Cook, covered, over a low heat for 20 mins, stirring occasionally. The apples should be tender.
Mix in the remaining ingredients. Bring to the boil and cook until the apples have turned into a thick sauce.
Preheat oven to 190C.
Spread the applesauce on the blind baked pastry shell. Arrange the apple slices on top of the sauce.
Bake for 30 mins, or until apples have browned and are tender.
Spread an apricot glaze (1/2 cup apricot jam mixed with 2 tbsp sugar heated until just simmering) over the top of the apples.
Sometimes, things don't plan out the way you expected. Even the little things. Sometimes I'm not the perfect housewife I imagine myself to be (and I'm not even married, things must be all kinds of messed up around here).
You get up in the morning with a plan for the day: Meet a friend at 10 for coffee, finish doing the housework (i.e. finish watching "True Blood"), and eventually make something delicious for dinner.
But things don't always go as planned. Your Dad calls in the morning and tells you that your sister and her friend want to go see a movie and you should go too ("The Social Network" was pretty interesting, in case you were wondering), you don't end up meeting your friend till late, and then you have to pick up some new litter for the cat because he's so fussy all the time and doesn't like the stuff that he has at the moment. When you finally come home, you've forgotten to get anything for dinner and there's only 'other stuff' in the house (i.e. pasta and rice but nothing to go with it). Your lovely boyfriend is tired from work and doesn't know what he wants to eat, so you have to go to the grocer and there isn't much to choose from, so you end up getting fancy rissoles and some lettuce. Your lovely boyfriend fires up the barbecue, and starts to cook them. The patties are so big that they never really get cooked in the middle, but they're very crisp on the outside, so you decide to put the in the oven for a bit. But then you both forget about them (the news can be really interesting sometimes), and by the time you remember to pull them out, they're ridiculously crisp and burnt, so you end up throwing them out and having eggs on toast instead. And then your cat gets his paw stuck down behind the heater and can't get out (good one, Rooney).
But these things happen. And this isn't even bad! If burnt rissoles are the biggest problem I've got, I guess my life is pretty good. People burn things, life goes on, the clock keeps ticking on by. I just have to remind myself this sometimes.
But tomorrow, I'll be ready. You better watch out, Friday, here I come...
I dreamt about this granola last night. I saw the recipe just before I went to bed and all night I dreamt that I was searching through cupboards to find the right spices. As soon as I woke up, I looked up the recipe again and got all the spices out of the cupboard. 8:00 am and there I am, measuring out spices, oats, and sultanas.
It's official. I've finally become one of those people that makes their own cereal. Do they still call those people housewives? Or just hippies? Either way, I'm not ashamed. I'll say it loud and proud. I make my own cereal. From scratch!
Unfortunately, I burnt some of my granola. I got sidetracked, and all of a sudden, I smell this amazing mix of sweet, aromatic spices, and burning toast. The tray that didn't burn was packed full of oaty, spicy goodness, but the other tray was a little scant, so just remember that when making your granola.
The spices in this make it more like a chai tea than a chai latte, so don't go expecting a sickly sweet taste, full of fake spices and flavourings.
If there are too many oats and not enough 'other stuff' in this granola to satisfy your breakfast taste buds, feel free to add wheatgerm (1/2 cup), pepitas or sunflower seeds (1/4 cup), shredded coconut (1/4 cup) or whatever else you like to eat. The only reason I didn't add these, was because it was early when I made this and I didn't want to walk to the shop.
While this is baking, my house filled with the scent of spices, like taking a big whiff from a box of chai tea, until I burnt it, that is.
But definitely try this. It's completely rewarding making your own granola. I feel like a wholesome, self-sufficient house fairy. I think that's a pretty good way to start the day, don't you?
Now, off to feed the chickens...
If you use whole spices (cloves, cardamom), remember to take them out of the honey mixture before you mix it into the oats, otherwise you might crunch a whole clove or cadamom pod and that would just ruin your breakfast. Ruin it. I'd definately recommmend to just use ground spices. And remember that this is not a heavily spiced granola. If you'd like it to be more spicey, you could use heaped tsps, but don't up the spices more than that, or it gets a bit much.
Oven 200C
1/2 cup honey
1/4 cup water
1/4 cup olive oil
1/2 tsp cinnamon
1/4 tsp salt
1/4 tsp ground cardamom or 3 or 4 whole pods
1/4 tsp ground cloves, or 3 or 4 whole cloves
1/4 tsp ground ginger
1/4 tsp ground nutmeg
1/4 tsp fresh ground pepper
1/2 a vanilla bean, sliced with seeds scraped into the honey, or 1/4 tsp vanilla essence
2 1/2 cups rolled oats
1/2 cup slivered or whole, chopped almonds
1/2 cup LSA mix
1 cup sultanas
In a small saucepan, mix together everything from the honey to the pepper.
Heat until dissolved and mixed, don't bring to the boil.
In a big bowl, mix the remaining ingredients.
Add the spice mixture to the dry ingredients and mix to combine.
Split between 2 lined baking trays, flattening the mix as you go.
Bake at 200C for 15 mins. Reduce heat to 170C and rotate trays, turning the granola as you go.
Bake for another 15 mins.
Leave the granola until cool.
Store in an airtight container.
It was my birthday this week and I got some excellent presents. A Chasseur cast-iron pot, the Julia Child cookbooks and a set of knives were the main ones. I feel so spoilt! I've been trying to cook things in my new pot and chop lots of things with my new knives and I'm in heaven. But the knives are so sharp that I keep cutting myself. It's the kind of sharp that means you don't realise you've cut yourself until you see the blood dripping down your fingers onto whatever you're chopping. I must've cut my finger pretty deep the other day, because it won't stop bleeding. When it does, if I even touch my finger on anything, it bleeds again.
It did stop bleeding long enough, though, for me to cook dinner. Out of the hundreds of recipes in the Julia Child book, I chose this one because it had Bonne Femme in the title. Really, though, it's just chicken in a casserole with bacon, potatoes and onions - my favourite kind of dish. I know that not everyone likes their dinner to be covered in butter, but I do. Everything tastes better with butter. If you don't like your chicken and potatoes swimming in butter, you should just turn away now, this is definitely not a calorie-friendly meal. Then again, you have to splurge sometimes, so you may as well go all out.
To be honest, I did expect this dish to be a bit more... wow. It was basically just a roast chicken with butter and bacon to make it special. Don't get me wrong, it was super tasty, and cooking chicken in a cast-iron pot is my new favourite past time, but I think it could benefit from something else. I'm not sure what... Actually, I didn't have the right amount of bacon, so that might've made a difference. Doesn't matter though, I'll definitely make this dish again.
Julia Child says to use a 1/2 pound chunk of bacon, which you then have to cut up into lardons. This seemed like to much hassle for me, so I just used 4 strips of bacon, which probably wasn't enough, but, whatever, I do what I want. She also says to use 15-25 white onions. I imagine she's talking about those little onions that you use for pickling, but really, that's a bit outrageous. I used 2 big brown onions instead.
Poulet en Cocotte Bonne Femme: Adapted from Julia Child's "Mastering The Art of French Cooking"
Oven- 180C
5 rashers of bacon, sliced
4 tbsp butter
1 chicken
2 big brown onions, cut in half with the skins off
4-5 medium potatoes, peeled, quartered
1/4 tsp salt
herb bouquet
Cover the potatoes in cold, salted water and bring to the boil. A couple of minutes before the water starts to boil, drop the onions in. As soon as it's boiled, drain everything.
Saute the bacon in 1 tbsp of butter in the cast-iron pot for 4-5 mins on the stove top. Take out and put aside.
Brown the chicken in the pot, until browned on all sides, be careful not to break the skin of the chicken.
Remove the chicken from the pot and keep aside. Pour out the butter from the casserole.
Put the last 3 tbsp butter in the pot and heat until foaming.
Add the potatoes to the pot, rolling them around to "evaporate their moisture."
While the pot is still on the stove, spread the potatoes around the edge of the dish and put the chicken back in, breast side up.
Salt the chicken.
Put the onions around the chicken and scatter the bacon on top.
Add the herb bouquet.
Baste everything with the butter at the bottom of the pan.
Cover the chicken with alfoil, and put the lid on.
Roast for 1 hour 10-20 mins until the chicken is done.
Serve the chicken with the butter sauce from the pot.
Sometimes I wish I didn't sleep so well. Just so that I had a reason - an excuse - for staying up indecently late and baking things. I never do though. I always bake at a reasonable hour. 3pm: There I am, mixing something or other in the kitchen. Actually, usually any time during the day I could be busily doing something else, and then it starts to creep up on me, The Urge To Bake Something. It's like somebody whispering in your ear. Subliminal messages just like1984.
I don't resist the pull though, I flow freely with the tide like a piece of driftwood. The call is always different: Brownies. Biscuits. Even savoury things. But the feeling is always the same: that indescribable need to be mixing, stirring, baking. To make something delicious and pretty out of a lump of dough.
And so I go with it. I follow my gut instincts and make whatever the moment calls for. I relish these times.
Just so you know, these are not Peanut Butter Brownies, just delicious, chewy, Chocolatey Brownies With Peanuts. This is different to the other brownie recipe that I posted, as this has melted chocolate and cocoa, rather than cocoa with chocolate chunks in it.
Recipe: Adapted from "Sweet Food"
Makes about 16.
Oven 180C.
125g dark chocolate, melted
90g butter, softened
1 cup sugar
2 eggs
2/3 cup plain flour
1/4 cup cocoa powder
2/3 cup salted peanuts, chopped.
Cream the butter, sugar and vanilla.
Add the eggs, one at a time, beating after each.
Stir in the melted chocolate.
Fold in the dry ingredients, followed by the peanuts.
Spoon into a lined square tin and bake for 30-35 mins or until done.
Cool before cutting and eating (the nuts taste better when they're cold, rather than when they're still a bit warm, so try and wait before eating them).


