Showing posts with label baking. Show all posts

Thursday, October 13, 2011

Chocolate & peanut butter sandwich cookies.

IMG_1950

Even though I've got this blog to keep track of the all the recipes I've made, I still hand write them all into a recipe book. Just in case.
I like the idea of having this hard copy of recipes. I like the idea of being able to hand this recipe book down to my children, or children's children. I have this somewhat romantic idea because my dad has a recipe book just like that. An old, hand written, taped-together at the seams recipe book that must have been handed down to him through the generations.

Stuffed into my recipe book are torn-out pages from cooking magazines. I haven't even cooked anything from most of these torn-out pages, but I keep them there for future reference. I don't think this 'future' will  ever come, though, because when I want to cook something I usually look on the net, rather than sifting through these neglected sheets of paper.

IMG_1944

But the other day, I was looking for something specific - a chocolate and peanut butter biscuit that didn't have any eggs in it - and the internet couldn't give me what I wanted. So for once, I rifled through these loose pages and found what I was looking for: Bitter chocolate and espresso sandwich cookies from an old Gourmet Traveller magazine. I changed the espresso filling to a peanut butter filling, but the recipe is basically the same.


I'm gonna go right ahead and say that these biscuits are kinda like peanut butter oreos. The chocolate biscuits are crunchy and not too sweet and almost a little bit salty (because I used salted butter). The peanut butter filling is sticky and peanut-y and delicious.
It's a good combination. When you bite into them, the peanut icing squishes out the sides. I like that.
I didn't bake my chocolate biscuits for long enough, so they were still a bit soft in the middle, but it wasn't a problem. They were still much too easy to eat. In fact, I think I'll have another one right now...


choc peanut butter cookies

Chocolate & peanut butter sandwich cookies:
Adapted from Gourmet Traveller magazine (date unknown).
Makes 12 filled biscuits


85g softened butter
110g caster sugar

100g plain flour
37g cocoa powder
3 tbsp milk (you may not need any or all of this)

Preheat oven to 190C, and line two baking trays.
Cream butter and sugar with an electric mixer until fluffy.
Stir in the flour and cocoa until combined. If it doesn't quite come together, or looks like breadcrumbs, add a teaspoon of milk at a time until the dough comes together.
Turn the dough out onto a flour board and knead until smooth.
Roll the dough out until 2-3 mm thick, and cut out with a round cookie cutter. 
Place the dough circles onto the lined trays. 


Repeat this process with the dough scraps. 

Prick the dough circles with a fork, and crimp the edges.
Bake for 10 minutes. Let cookies cool on trays for 5 minutes before removing to a wire rack to cool.

Peanut butter filling:
200g icing sugar
6-7 tbsp smooth peanut butter
1/2 tsp salt

Beat all ingredients until smooth. Taste and add more peanut butter/salt until you reach the right consistency and taste.
Ice on biscuit and sandwich together with an un-iced biscuit. Repeat until all biscuits are sandwiched together

Friday, October 7, 2011

Chocolate & coffee cake

cake1

It seems I have created my own tradition. I've never created a tradition before, so I don't know if it actually counts...
My friend Steph and I have breakfast together on our birthdays. Breakfast with just us, because everybody else works and can't have breakfast during the week.
This started last year, when I wanted to do something for my birthday, but everyone in my family was busy, and so Steph took care of me and we went out for breakfast together.
This year, Steph's family were all busy, so I took care of her and we went out for breakfast.

cake3

Does this count as a tradition? If it happens two years in a row, that's a tradition, right?
I guess we'll have to wait until next year to see if it sticks, but I hope it does.
Another good birthday tradition that I did obviously not come up with, is cake.
IMG_1876

Cake and presents. That's a good tradition that everyone should get in on, if you're not already.
Cake and presents and candles. I know I said that when you turn 23 you don't get candles, but 22 is different. You still get candles when you turn 22. Didn't you know?

IMG_1886
It was hard deciding what cake to make for Steph. She doesn't like cheesecake, or carrot cake. She does like coffee though, so that's the direction I went in.
Coffee and chocolate, what a good combination! Perfect for a girl with a coffee addiction.
I actually baked this cake in a vintage jelly mold, because I didn't have a decorative bundt pan, which is what I originally wanted to use. The jelly mold wasn't very big, so I made 6 cupcakes as well.
If you wanted to make all cupcakes, I think this recipe would make 12. Just raise the temperature of the oven and shorten the baking time by about 5-10 mins.

cake21

Chocolate and coffee cake:
From Sweetapolita


225g butter
1/2 cup cocoa
1 tbsp instant coffee dissolved into 3/4 cup water
2 cups sugar
1 cup sour cream (1 x 220mL tub)
1 tbsp vanilla extract
2 eggs
2 cups plain flour
1 tsp baking soda
1/2 tsp salt

Preheat oven to 180C. Grease and flour a 10 cup bundt tin.
Melt butter in a large saucepan. 
Add cocoa, stirring until smooth. 
Whisk in coffee water. Remove pan from heat.
Stir in sugar, sour cream, vanilla and eggs.
Add remaining ingredients, stirring until well blended.
Pour into prepared tin. Bake for 40-50 minutes, until skewer inserted into center comes out clean.
Cool in tin for 20 minutes before inverting onto a wire rack. Cool completely before icing.

Chocolate and coffee glaze:
Adapted from Sweetapolita

100g dark chocolate
75g unsalted butter
1 tbsp instant coffee powder dissolved in 2 tbsp water
1 1/2 tsp glucose syrup

Melt all ingredients in a metal bowl set over a pan of simmering water.
When mostly melted, stir until smooth.
Pour over cooled cake.
Optional: Shave dark chocolate over iced cake using a vegetable peeler.

Friday, September 23, 2011

Chocolate & almond cake.

IMG_1739

Every birthday deserves cake. It just wouldn't be the same otherwise.
This cake was for my friend Kirby's birthday.
It's full of chocolate and almonds and even more chocolate.

IMG_1706

But when you turn 23, you don't get candles or singing on your birthday. Especially not in a lovely cafe when you're eating lunch.
We had a lovely lunch at Jam Jar, and there was sav blanc and lovely ladies and warm winter salads.

IMG_1740
IMG_1752

After lunch, there were more drinks, and more friends, and cocktails that came in bear-shaped jars.
The rest of the night looked like this, dark and a little bit blurry.

(I'm not even sure that I'm allowed to call Kirby 'turdy'. I don't know where the nickname came from, and I don't know if people still call her that. But it kinda just happened on the cake bunting and so we'll just go with it.)

IMG_1755
IMG_1762

Chocolate & Almond Cake:
Slightly adapted from Julia Child's "Mastering the art of French cooking"


I doubled Julia's original recipe to make the layer cake above. But if you just want to make this to bring to a nice family dinner, halve the recipe back down. Although, it won't look quite as impressive that way...


200g dark chocolate
250g butter, softened
300g sugar
6 eggs
pinch salt
2 tbsp sugar
2/3 cup almond meal
1/2 tsp almond extract
1 cup plain flour

Preheat oven to 170C. Grease two 20cm springform pans.
Melt the chocolate in a metal bowl set over a pot of simmering water. Don't let the water touch the bowl. When melted, take of the heat and set aside.
Separate the eggs, placing the whites in a large bowl.
Beat the egg whites with a pinch of salt, until soft peaks form (about 1-2 mins). Sprinkle the sugar over and continue beating on high until stiff peaks are formed (another few minutes). Set aside.
Beat the butter, sugar and egg yolks in a large bowl, until pale.
Stir the melted sugar into the butter mixture. Stir in the almond meal and extract.
Quickly stir in a quarter of the egg whites.
Fold in a third of the remaining whites. When partially incorporated, add a third of the flour and continue folding.
Continue alternating between adding eggs and flour, until all ingredients are incorporated.
Divide the batter between the two pans.
Bake for 25 mins, until the edges are cooked, but the middle is not quite set. A skewer should come out clean around the edge, but be slightly oily in the middle.
Leave to cool for at least 2 hours before icing.

Chocolate ganache:
Slightly adapted from Julia Child


200g dark chocolate
100g butter
1 tsp vanilla essence

Place all ingredients in a metal bowl set over a pot of simmering water. Don't let the bowl touch the water.
Allow the mixture the melt before stirring until smooth.
Plunge the bowl into a larger bowl of ice cold water, and quickly whisk with a spoon until the mixture has cooled and thickened.
You have to work really fast with the icing, because once it has begun to set, it hardens very quickly and becomes difficult to work with.
Use a spoon/knife dipped in hot water to spread the icing onto the cakes, and sandwich them together. Continue dipping the spoon into hot water to smooth the icing.
Decorate with roasted almonds.

Saturday, September 17, 2011

Sea Salt & Rosemary Focaccia

IMG_1642

I like bread a lot. In fact, I'd go so far as saying I was all about it.
I think I've only made bread once before, but this was different.
Making bread is much easier that I imagine it to be. Even though it's all kneading and rising, bread isn't hard. Probably because it's all kneading and rising. I'd love to make bread all the time, but I don't have the time to wait around for it to rise. How did they do it in the old days, when they had fresh bread in the morning? You'd have to get up three hours before you wanted breakfast. Three Hours! I couldn't do that. I like to have tea and toast as soon as I'm dressed. It's just how I roll.

IMG_1641

This bread was a lazy weekend activity. I made the bread in the morning and we ate it for lunch, stuffed with grilled haloumi and fresh salad. In that respect, it kind of requires planning, because the bread has to rise for 3 hours in total. But this does mean that you can do whatever you want while you're waiting, because the bread doesn't need babysitting. You could visit your parents, go for a run, make a dress, clean your house, play with your cat. The possibilities are endless!

IMG_1649

The toppings for this focaccia are also endless. This one had roasted garlic, fresh rosemary, pink sea salt, and olive oil. I think the garlic was unnecessary, and if I made this again, I wouldn't use it. Garlic olive oil might be better. I think chopped olives or chilli might be nice. I also think that the focaccia should be baked thinner than I made it. You don't even really need a square tin to bake the bread in, you could just spread the dough out onto a flat metal tray and make a really thin, rustic bread. Drizzled with oil and sprinkled with sea salt, this would be the perfect accompaniment to summer salad and enjoyed with friends at a barbecue.

Sea salt & rosemary focaccia:
Adapted slightly from Food On Paper

If you want to use roasted garlic as well, simply wrap three unpeeled garlic cloves in al-foil, and bake at 200C for 30 minutes. Chop and sprinkle onto the dough before baking.
Use the best sea salt flakes you can. I used Murray River pink salt flakes.


¼ teaspoon caster sugar
1 sachet of instant dry yeast (7g)
400ml warm water
500g plain flour
1 teaspoon sea salt
1 tablespoon olive oil
Olive oil, Fresh or dried rosemary & Sea salt flakes to top. 

In a small bowl, mix the sugar, yeast and 60ml of warm water. Cover and leave in a warm spot for 5 minutes for the yeast to activate (it should become foamy and almost rise up. If it doesn't, start again).
In a large bowl, add the flour, salt, yeast mix, and half the warm water. Stir with a spoon to combine.
Add more water as necessary, until a solid dough starts to form. You may not need all the water, so add a bit at a time.
Turn the dough out onto a lightly floured surface, and knead the dough for 8 minutes, until smooth and elastic.
Place the dough into an oiled bowl (a glass or plastic bowl is good because you can see it rising). Cover with cling wrap and a damp tea towel. Leave in a warm, draught free place for 1 1/2 hours, until doubled in size.
When the dough has risen, take off the cling wrap and the towel and punch the dough down with your fist to remove any air bubbles. 
Line a baking tray with baking paper (the smaller the tray, the higher the bread after its baked) and put the dough into the tray. Spread the dough out with your fingers, reaching to the corners of the tray.
Cover the tray again with cling wrap and the tea towel and leave in a warm place for another 1 1/2 hours.
Preheat the oven to 220C.
Take the wrappings off the dough and drizzle with olive oil and sprinkle with sea salt flakes and rosemary.
Bake for 10-15 minutes, or until golden and crisp to the touch.
Drizzle with a little more olive oil before serving. 

Friday, September 2, 2011

A good thing.

cookie

A good thing: Spending the afternoon with your best friend in the sunshine, drinking cider and looking at summer dresses.

Another good thing: Biscuits. Especially ones that you don't feel guilty about eating for breakfast.

IMG_1598

These biscuits are good for breakfast. They're also good for afternoon tea, and any time of the day, really. They're full of healthy and delicious things: carrots, oats, dates, coconut, almond meal, maple syrup. That's it really.

I was really full after eating two these little cookies for breakfast (which went perfectly with a cup of Russian Caravan tea). They're just so satisfying and wholesome: a good start to the day. Especially on your day off.

cookie2

Feel free to play around with the fruit/nut/flour elements. You can see different variations here and here (My recipe is based on the former). The carrot flavour isn't really noticeable, it just makes you feel healthy, which is always a good thing, y'know? But I think next time I'll make these, I'll use honey instead of maple syrup, just because maple syrup is SO expensive, and using a 1/4 cup in these makes me a bit giddy (I like to save my maple syrup for pancakes, rather than just making biscuits for myself at breakfast).

I also don't know what to call these. Calling them Carrot Biscuits doesn't really do them justice, and also doesn't make them sound very appetising. I might just leave them without a name. Nameless biscuits.

Recipe:
Adapted from 101 cookbooks

I halved the original recipe before adapting it. Feel free to double it back up if you're feeding lots of people. I also baked half the cookies, and then left the remaining uncooked mix in the fridge, then made fresh cookies the next day rather than making them all at once.

1/4 cup desiccated coconut
1/2 cup almond meal
pinch salt
1/2 cup oats
1/4 tsp each of cinnamon and ground ginger
1/2 cup grated carrot (about 1/2 a large carrot)
1/4 cup maple syrup
1/4 cup vegetable oil
1/4 cup chopped dates (about 6 dates)

Preheat oven to 180C and line a baking tray.
IN a medium bowl, stir together the dry ingredients.
Stir in the remaining ingredients.
Form into balls (I liked bigger biscuits better than little ones, much bigger than a tablespoon), and place on lined tray.
Bake for 10-12 minutes until brown on the bottom and top, but they'll still be quite soft.

Saturday, August 27, 2011

Cherry & almond cake.

cherry cake1

You know what's embarrassing? You're at the supermarket buying toilet paper. You reach up to grab a pack off the top shelf. They're precariously stacked on the shelf, and as you pull your packet down, all the packages of toilet paper fall off the shelf and onto your head.

You know what isn't embarrassing? Making a perfect cake. So perfect that people ask you for the recipe. And after my last cake debacle, I needed to bake something that made me feel better about my skillz.

This cake definitely did that. It was dotted with cherries and perfectly risen. Dusted with icing sugar, it was the perfect dessert to share with family. You could probably sub something in for the cherries if you can't find these, like some nice seasonal berry (they're not in season here. Yet.). I think a splash of almond extract would bring out the flavour of the almond meal, but it isn't necessary, because the cake is perfect. Just as it is.

cherry cake2

Cherry & almond cake:
Slightly adapted from 'Sweet Food'

125g unsalted butter, at room temp
185g sugar
2 eggs
95g (1 cup) almond meal
185g plain flour
2 tsp baking powder
1/2 cup milk
1 jar (680g) morello cherries

Drain the cherries in a colander/sieve (reserve the juice for yummy drinks later).
Preheat the oven to 180C, and grease a 20cm fluted tin.
Cream butter and sugar.
Add eggs one at a time, beating after each addition.
Stir in the almond meal.
Fold in half the flour and baking powder, then all the milk, the remaining flour/baking powder.
Gently fold in the cherries.
Scrape the mix into the prepared tin.
Bake for 45-50 mins, until cake tester comes out clean.
Leave to cool in the pan for 10 mins, before turning out onto a wire rack to cool completely.
Dust with icing sugar to serve.

Wednesday, August 3, 2011

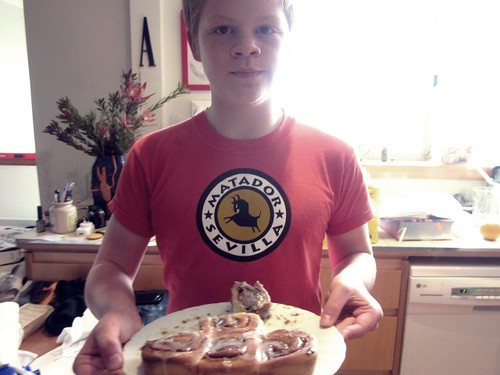
Cinnamon buns.

IMG_1135

cinnamon buns

IMG_1041

IMG_1064

IMG_1072

cinnamon buns1

Cinnamon buns recipe:
From Smitten Kitchen

For the dough:
1 cup milk
3 tbs unsalted butter
3 1/2 cups plain flour
1/2 cup white sugar
1 egg
7g packet dry, instant yeast
1 tsp salt

Place the milk and butter into a small saucepan and heat over medium heat until butter has melted and milk is warm.
Pour into a big mixing bowl and add 1 cup of the flour, sugar, egg, yeast and salt.
Beat on low speed for 3 minutes.
Add the remaining flour and beat until incorporated and the dough is sticky (You might have to do this with a wooden spoon, rather than a hand mixer). The dough should be sticky, but not too sticky.
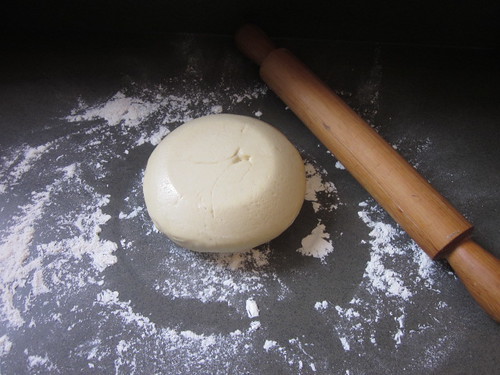
Tip the dough out onto a lightly floured work surface to knead.
If you find that the dough is sticking to your hands, sprinkle the dough with flour and keep kneading until the dough is smooth and almost elastic, about 8 minutes.
Form the dough into a nice ball and place into a large, lightly oiled bowl.
Cover with cling wrap and a clean tea towel and place in a warm, draught-free place until the dough has doubled in size, about 2 hours.


For the cinnamon filling:
3/4 cup (packed) brown sugar
2 tbs ground cinnamon
1/4 cup unsalted butter, melted
Pinch of salt
3/4 cup sultanas

While the dough is rising, mix the brown sugar, cinnamon and salt together in a small bowl and set aside.

Tip the risen dough out onto a lightly floured work surface.
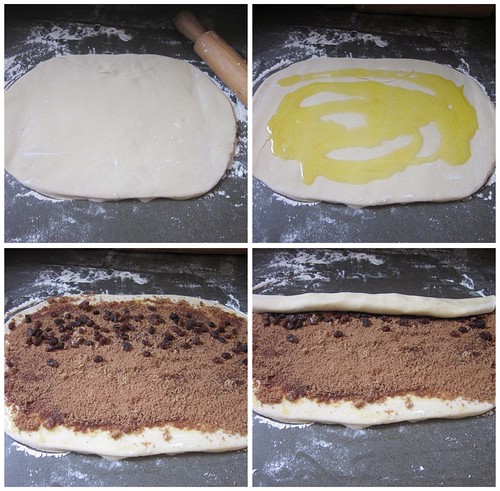
Roll the dough out to a 15by11 inch rectangle.
Pour the melted butter over the dough and sprinkle with cinnamon sugar and sultanas.
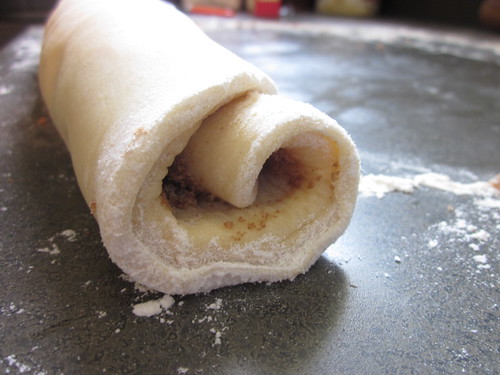
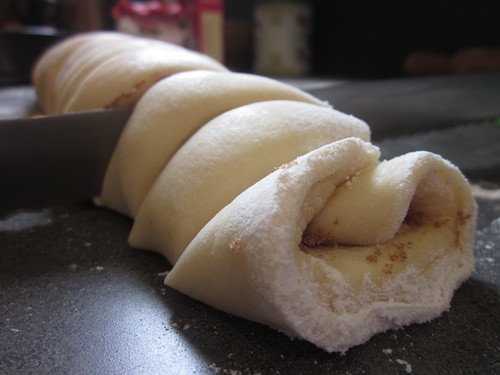
Starting at the long side, roll the dough up towards you into a tight log.
Seam side down, slice the cinnamon log into 18-20 small slices.
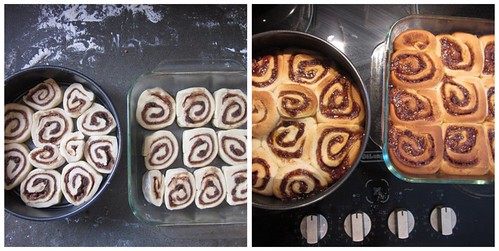
Place the slices into 2 greased tins (I found that a 20cm springform tin was easier to get out, but a square tin is fine too), cut side up.
Cover each tin with cling wrap and a clean tea-towel and place in a warm, draught-free spot to rise for 40-45 mins.
Pre-heat oven to 190C, and stick the trays in the oven.
Bake the rolls for 20 mins, until the tops are golden.
Take the trays from the oven and flip the buns out onto a wire rack to cool.
Glaze buns when cool.


For the orange glaze (optional):
1 1/2 cups icing sugar
juice and zest of half an orange

Mix all ingredients together until smooth. If the icing is a bit thick, add more juice until it's runny enough to pour onto the buns.

Wednesday, July 20, 2011

Choc-chip muffins.

IMG_0970

I like chocolate. I like muffins. I like anything baked.
What's not to like about these?

They were exactly what I imagine a muffin should be - brown and crispy on top, full of chocolate chunks,  bulging out of their little paper cups - but mine never are. They looked perfect.

But there was one problem. They had a funny taste. I have no idea why! I think maybe - and this is gross - that the muffin tin was dirty or something... yuck. I might have to make these again (after I've washed the muffin tin) to see if that is actually what the problem was.

IMG_0972


Choc-chip muffins
From The Kitchn
Makes 9 muffins


110g butter (4oz), at room temperature
1 cup sugar
2 eggs
2 cups plain flour
2 tsps baking powder
1/2 tsp salt
1/4 cup milk 
1 tsp pure vanilla extract
1 1/2 cups chocolate chips (dark or milk)


Preheat oven to 190C and line a muffin tin with paper cases.
Cream the butter and sugar in a large bowl until fluffy.
Beat in eggs, one at a time, until well incorporated.
Beat in one cup of flour, then the milk, followed  by the last cup of flour and the remaining ingredients. 
Mix until just combined. 
Spoon the mix into the paper cases, filling them up almost to the top. 
Bake for 20-25 minutes until a skewer inserted in the middle comes out clean.


Sunday, June 26, 2011

Eclairs au chocolat.

chocolate eclairs

Some days, I wish I had gone to pâtisserie school, rather than to teacher school. I seriously considered it, before deciding that I would have to get up too early in the morning if I was going to be a pâtissier.
Which, really, is a dumb reason to have changed my mind.

I'm not sure that making pastries for a living would be as much fun as doing it at home. 
I definitely get an enormous sense of satisfaction from making something like eclairs without any help at all (except from Julia Child, of course). 

I get this satisfaction even though eclairs aren't as difficult as I'd imagined them to be. 

chocolate eclairs

I've wanted to make choux pastry ever since I saw the Croquembouche on Masterchef, but I always thought it was going to be outrageously difficult. But they lied. It isn't that difficult to make. 
And after being in Sydney last week and eating far too many chocolate eclairs, I decided it was about time that I made some myself. 

I'm glad that I did.

chocolate eclairs

Despite these actually looking like profiteroles, I'm going to call them eclairs. But we don't need to argue about this. Just eat them.
I gave some of these to my family, and took some of them into work.
They were very well received, and for good reason, too. They are impressively tasty, if I do say so myself.


chocolate eclairs

Chocolate Eclairs.
Adapted, ever so slightly, from Julia Child's 'Mastering the Art of French Cooking'.
Using these amounts, I made 17 puffs: all of different sizes. I did this because I wanted to see which size I preferred (the smaller ones were better). I'm going to say that the choux mix would make roughly 20 puffs measuring 10cm across (once cooked). I actually didn't have quite enough custard to fill all the puffs, but the ones I did fill had a bit too much custard. You could either double the custard quantities and have some left over so that each puff got filled with a large amount of custard. Or use this amount and fill each puff a bit less, to make sure that each puff gets filled. Or you could just fill the remaining puffs with icecream.


For the choux pastry:
1 cup water
85g butter (3 oz)
pinch salt
1 tsp sugar
3/4 cup plain flour
4 eggs

In a large saucepan, bring water, butter, salt and sugar to the boil, until butter has melted.
Take off the heat and add the flour. Stir vigorously with a wooden spoon until thoroughly mixed.
Place over a medium heat and continue beating until mix leaves the sides of the pan and forms a mass.
Remove from heat. Make a well in the centre and crack in one egg. Beat thoroughly until mixed. At this point, it looks almost like the eggs won't incorporate, but just keep mixing. I promise it will all come together!
Continue mixing in the eggs, one at a time. Beating thoroughly after each one.
Preheat the oven to 210C.
Spoon the mix into a pastry bag and pipe onto a lined baking tray, either into circles or oblongs. The dough will double in size as it cooks, so take this into consideration when piping them. Leave a decent space between each puff.
Alternatively, use two teaspoons to scoop balls of dough onto the trays. (This is what I did, but the piping bag method is neater).
Paint beaten egg or milk onto the tops of the puffs, flattening them down slightly.
Bake for 20 mins. They will be brown and crispy and doubled in size when ready.
Take the trays out of the oven and spike each puff with a sharp knife to release the steam (Otherwise they go soggy). Place back on the tray and leave in the turned off oven for ten minutes with the door ajar, before removing to a rack to cool completely.


For the chocolate custard:
1/2 cup white sugar
1 egg yolk
1 egg
1/4 cup flour
1 cup boiling milk
80g dark chocolate, chopped very, very small
1 tsp vanilla essence

In a medium bowl, whisk the eggs.
Gradually beat in the sugar using a whisk. Once all incorporated, continue beating until eggs are pale and thick (about 3 mins).
Mix in the flour.
Gradually mix in the milk, beating continuously.
Pour the mix into a saucepan and set over moderate heat.
Continue stirring until mixture boils. It will start to become lumpy, but it'll smooth out as you keep beating.
Turn the heat down to moderately-low and cook for 2-3 minutes, making sure the mix doesn't scorch on the bottom of the pan.
Add the chopped chocolate and stir until chocolate is melted.


For the glaze:
90g dark chocolate, broken into pieces
70g unsalted butter, diced

Place the chocolate and butter in a metal bowl set over a pan of simmering water. Make sure the water doesn't touch the bottom of the bowl.
When the butter has melted and the chocolate is mostly, but not completely, melted take the bowl off the pan and stir until the chocolate has melted and the mix is smooth.

To assemble:
Fill a piping bag with custard.
Take a cooled puff and stick the nozzle of the piping bag into the slit you made in the side of the puff.
Fill with custard.
Top the puff with chocolate glaze.
Leave to cool before eating.

Wednesday, June 15, 2011

Peanut-butter choc-chip cream-cheese cookies.

peanut butter choc chip cookies

I'm going through a cookie phase.

I've mentioned before that I go through phases of liking things. Lucky for everyone around me, it's a phase they can all appreciate.

peanut butter choc chip cookies

And besides, if you give freshly baked cookies to your friends, they like you more.

Or so I've heard.

peanut butter choc chip cookies

peanut butter choc chip cookies

Especially when the cookies are full of dark chocolate and peanut butter. I don't think I need to tell you how good this combination is. I'm sure you know it already. But if you don't, you should make some of these.
I think they'll even turn the least-peanut-butter-liking person into a peanut-butter-liking person. Truth.

peanut butter choc chip cookies

peanut butter choc chip cookies

I changed the original recipe a bit. I know, I'm a rebel.
I swapped butter for cream cheese because I wanted to use some left over cream cheese that I had. I wasn't sure how it would work, but it worked great. You could taste the cream cheese before the cookies were cooked, but after, I couldn't really taste it.
I used half a block of dark chocolate, chopped up so that some bits were really big and chunky and some bits were really small. They were also great.
I've also changed all the measurements into weights, rather than cups. Because it makes less washing up for me, and lets face it, that's a good thing.

peanut butter choc chip cookies

Peanut-Butter Choc-Chip Cream-Cheese Cookies.
Adapted from Smitten Kitchen
Makes about 28 cookies


110g (4oz) cream cheese
1 cup peanut butter (8oz)
250g (8oz) sugar
1 egg
1 tbsp milk
1 tsp vanilla
150g (5oz) plain flour
3/4 tsp baking powder
1/2 tsp baking soda
1/4 tsp salt
1/2 cup dark chocolate, chopped (about half a block)

Preheat oven to 175C. Line two baking trays.
Beat cream cheese and peanut butter in a large bowl. Beat until smooth.
Mix in sugar.
Add egg and mix well.
Beat in milk and vanilla, followed by dry ingredients.
Fold in the chopped chocolate.
Roll tbsp sized balls of batter and place on lined trays. (Optional: You can roll these balls in sugar before baking them. I found this unnecessary).
Flatten the balls down slightly and bake for 10-12 mins. They'll be quite soft still when they come out of the oven, but you don't want to overcook them.

Thursday, June 9, 2011

Chocolate brownie cookies.

brownie cookies

It's no secret that I love brownies. I'd like to say that this obsession started when I was a little girl, but when I was little, I didn't like chocolate.
 I don't remember when I decided that brownies were my favourite chocolate thing, but they are. Brent loves them, too (we're so compatible!). There are not many things that he requests that I make. But brownies are one of them.

Unfortunately for him, he works all day and I'm on holidays. At home. On the couch. Watching Buffy and reading lots and lots of books. So he didn't get to eat many of these delicious, chewy cookies.

brownie cookies

These cookies are exactly like a brownie. I'd even go so far as saying that I like them better. They're my new favourite thing. They're chewy and soft in the middle and crispy and cracked on the top and around the edge. I actually thought they were a bit sweet though. Weird. A half cup is the proper amount of sugar to use, but if you, like me, prefer your cookies a bit less sweet, you can reduce the sugar.

I knew even before I made them that they would be great. So I only made half a batch - the amount that I've given you. But if you think that you have more self control around delicious, chewy, chocolatey things than I do, go ahead and make a whole batch.

I dare you.

brownie cookies

Brownie Cookies.
Adapted from Joy The Baker
Makes about 12 cookies.

120g dark chocolate, chopped
1 1/2 tbsp unsalted butter
1/4-1/2 cup sugar
1 egg
1/2 tsp instant coffee
1/2 tsp vanilla
1/2 cup plain flour
1/4 tsp baking powder
pinch salt
optional: 2 rows dark chocolate chopped small, or 1/2 cup choc chips

Melt the chocolate and butter in a metal bowl set over simmering water.
In a large bowl, beat the sugar and egg with a spoon until frothy.
Pour in the chocolate, and stir in the rest of the ingredients.
Fold in the chopped chocolate, if using.
Stick the bowl in the freezer for 10 mins (in the meantime, you can wash the dishes. You probably should do this before the cookies are done and you sit down to eat them all).
Preheat oven to 170C and line 2 baking trays.
Take the bowl out of the freezer and scoop tbsp sized balls onto the trays. Don't put the cookies too close together, they'll spread as they cook. Leave the dough in little balls, don't press it down.
Bake the cookies for 11-12 minutes, until cracked on the top and set in the middle. You want the cookies to be quite soft still, like a brownie.
Transfer the cookies to a wire rack to cool slightly before putting into your mouth.

Wednesday, June 1, 2011

Snickerdoodles.

IMG_0741

I've always wanted to make snickerdoodles. Just because of the name. I didn't really know what they were going to be like when I made them, but they're a biscuit, right? Obviously they're going to be nice. Plus, I didn't have to leave the house to buy any new ingredients to make them. Flour, butter, sugar, cinnamon? I'm sure you've got all those in your house.

For the moment, I'm undecided on whether I actually like these biscuits. They turned out great. They were cakey in the middle and crisp around the edges. They were rolled in cinnamon sugar and were all cracked on top.

But they didn't really taste like that much. And I used self-raising flour, rather than plain, and they were a bit metallic tasting, because of the baking powder that that brand used. Because I've never had snickerdoodles before, I wasn't sure if they were meant to taste that plain (read: bland)or if I'd done something wrong. It doesn't matter. I still ate them all anyway...

IMG_0745

Snickerdoodles.
Makes 12
Adapted from Smitten Kitchen


170g self-raising flour
pinch of salt
110g unsalted butter, soft
200g caster sugar
1 tbsp ground cinnamon + 1 tsp
1 egg

Preheat oven to 200C and line two baking trays.
In a large bowl, cream butter and 180g of the sugar until light and fluffy.
Add egg and mix.
Mix in flour, salt and 1 tsp cinnamon.
Combine remaining sugar and cinnamon on a plate.
Roll tablespoons of dough in the cinnamon sugar and place on baking tray. Place them quite far apart as they spread quite a bit. I did 6 biscuits to a tray.
Bake for 10 mins. They'll be soft still, but cooked in the middle and slightly brown on the bottom.

Tuesday, May 31, 2011

Olive savoury muffins.


I'm the kind of person who needs to bake things. I don't know what it is, but I get this urge to bake. I can't help it. And when I don't want to make something sweet, I have to make something else.

A little while ago I went to the bakery with my friend and bought a savoury muffin. It was full of pumpkin and roast capsicum and sun-dried tomatoes and olives. Yum.

These savoury muffins aren't quite that full of things, but they still taste great. They're a mix-and-bake sort of a muffin. The cheese on top makes them a little bit tastier. And they're super good straight out of the oven with some homemade relish on the top. These muffins are crumbly and moist.
Here comes lunch!

Olive savoury muffins.
Adapted from Stephanie Alexander's 'The cooks companion' 
Makes 12


220g self-raising flour
3/4 cup milk
1 egg
1/2 cup oil (I used olive)
70g pitted kalamata olives, chopped
1/4-1/2 tsp cayenne pepper
salt and pepper
grated parmesan, to top the muffins

Preheat oven to 180C and grease a muffin tin.
Put flour, cayenne pepper and salt and pepper (to taste) into a large bowl.
Make a well in the centre and pour in milk, oil and the egg.
Mix everything together until just combined.
Fold in the olives.
Spoon into the muffin tins and top with grated parmesan.
Bake for 20-25 mins.

Wednesday, May 25, 2011

Contradictions and lessons: Quince cake.

quince cake

This cake was both a disaster and a success. It seems odd that one cake can be so contradictory, but it's true. It was a success because I hadn't made a cake with quinces before, and there were so many opportunities for it to go badly, but it didn't. The quinces were perfectly poached, the batter tasted good and the syrup on top was amazing.
It was a disaster, though, because of the syrup on top. If you only learn one thing today, please, let it be this: Don't be impatient.
I poured the syrup on the cake while it was cooling in the pan. And then I flipped out the cake onto a plate. When I tried to flip it back onto the cooling rack, the syrup was stuck to the plate and ripped the sticky top off the cake. Not completely, but enough for me to freak out.
I freak out a lot when I'm baking.
And I don't think the cake was quite cooked properly.

So there you have it: Contradictions.

quince cake

A quince is not a pretty fruit. They're motley yellow and covered in a grey fluff. You can't eat them raw because they're outrageously tart. And when you peel and chop them, not only do they brown almost instantly, but they smell funny. After they've been poached, though, they turn a lovely rosey colour and they taste much better than you could have imagined.
I made a fairly simple tea cake batter (is that what you call it?) for this recipe and mashed half the poached quinces into the batter. Then I put the rest of the quinces into the batter, imagining that they would be nice to bite into. Next time, I'd mash all the quinces into the cake, just to see what a difference that makes. I'll have to wait till next year, I guess, because I used all my quinces in this cake.

I took this cake into work and made everyone eat it, and they all seemed to like it. So take that, Disaster!

Quince tea cake.
Adapted from Epicurious

2 cups poached quinces*
220g self-raising flour
1/4 teaspoon cinnamon
1/4 teaspoon salt
110g unsalted butter, softened
330g sugar
3 eggs
1/2 cup pure cream
1 teaspoon vanilla

Preheat oven to 160C. Grease and flour a 20cm springform pan.
Cream butter and sugar.
Add eggs, one at a time, beating well after each one.
Mix flour, cinnamon and salt together.
Beat in half the flour mix.
Add the cream.
Beat in remaining flour mix and vanilla.
Strain poaching liquid from quinces and reserve.
Mash half the poached quinces and fold into the batter.
Pour half the batter into the prepared tin.
Arrange remaining poached quinces over the batter.
Pour the remaining batter over the quinces.
Bake for 1 1/4 hours, or until cake tester comes out clean.

[Optional] Make a sticky quince syrup. In a small saucepan, mix the reserved poaching liquid with 1/2 cup water, 3 tbsp caster sugar and 2 tsps lemon juice. Cook over a low heat, stirring until the sugar has dissolved, until mixture starts to thicken. Pour this over the cake once it has cooled.

*Poach peeled, cored and chopped quinces with about 2 cups water, 4 tbsps sugar, cinnamon and 1 vanilla bean, until soft, about 20-30 mins. If you're new to quinces, you could use less than 2 cups.
This was about 8 medium quinces that were a bit bruised and had been eaten by bugs. So I ended up with less use-able fruit than I anticipated.

Wednesday, April 27, 2011

A story about apples.

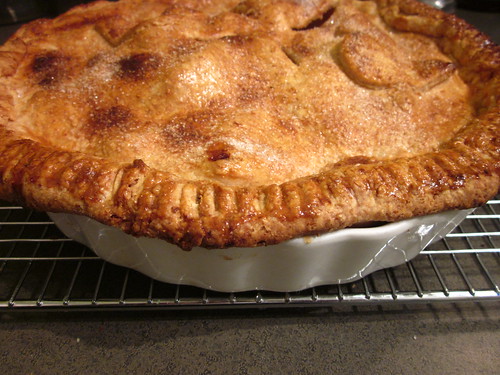
IMG_0537
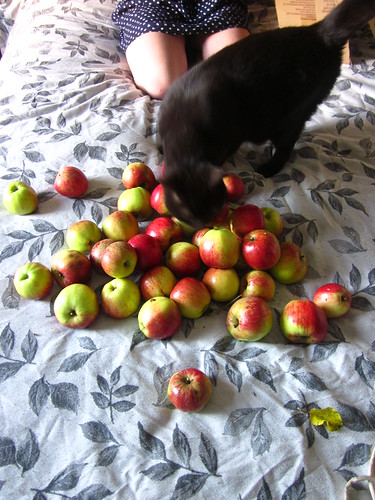
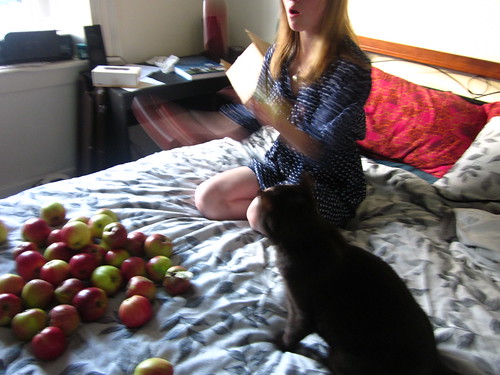
My dad has a big apple tree growing in his back yard. No-body knows what kind of apples they are, but we do know that they are good for cooking.
You know what else is good for cooking? Pie is good for cooking.
IMG_0496
IMG_0533
When dad gave me this huge bag of apples, the first thing I thought of was pie. But the weird thing was, I didn't really know how to make the pie. I think that making pie is one of those things that people should just know how to make. But I didn't. I had to look up a recipe. I mean, I know how to make pastry, I just didn't know what to put inside the pastry. Other than apples, obviously.
IMG_0522
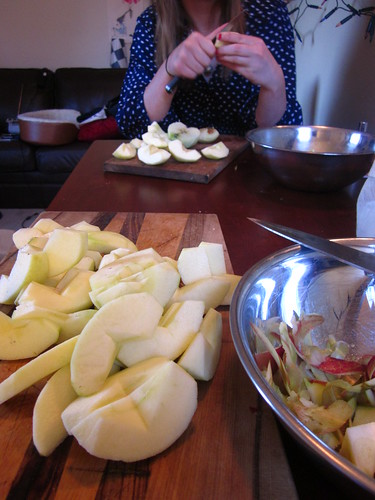
But I found a recipe in the end. And I used a whole block of butter. And then my sister dropped over unannounced and she helped me peel all the apples. And then we juggled the apples, because we remembered that once upon a time, we knew how to do it. And then we ate lots of the peeled apples with some sharp cheddar cheese, because that is a really good combination. And we drank some tea and we had a really nice time.
IMG_0513

Apple Pie
Adapted from Smitten Kitchen

One serving of pastry from this recipe (also from Smitten Kitchen)
7 medium cooking apples
1 tablespoon orange juice
1/2 cup white sugar
2 tbsp flour
1/4 tsp salt
1 tsp cinnamon
1/4 tsp ground nutmeg
1/4 tsp ground ginger
1/4 tsp ground cloves
1 egg, beaten lightly (for glazing the pie lid)

Preheat the oven to 250C and make sure the oven rack is on the bottom shelf. This is important for a crispy pie base.
Peel, core and chop the apples (it's helpful if you have a sister or other nice sibling to help you do this).
Put them in a bowl and toss them with the juice and the dry ingredients. Set these aside.
Line the pie tin with half of the chilled, rolled out pastry, making sure there is enough overlapping the dish. Chill for 5 mins in the fridge.
Arrange the apples on the pastry case, piling them up in the middle.
Lay the other half of the rolled out pastry on top of the apples, making sure there is enough pastry overlapping the dish.
Fold the bottom layer of pastry over the top of the pie, like a blanket. This way, the pastry won't shrink and the apple juices won't escape.
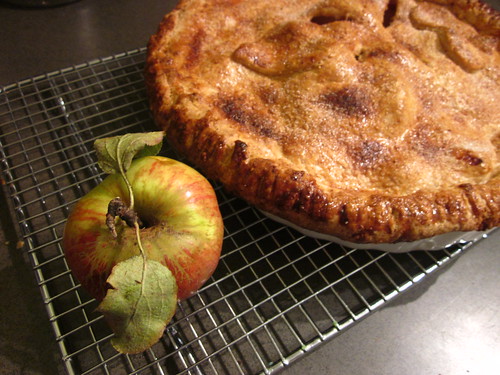
Crimp and arrange the pastry so it sticks onto itself and looks nice. You could use the edge of a fork to make the crimps.
Cut four slits in the top of the pie.
Brush the pie with the egg.
Sprinkle the top of the pie with some granulated sugar.
Put the pie in the oven and immediately turn the oven down to 220C. Bake for 25 mins until crust is golden.
Turn the oven down again to 190C, rotate the pie and continue to bake for another 30-35 mins.
Let the pie cool before cutting and serving to your nice family.